Have you ever wondered how clothing gets made in different sizes? It’s a rather technical process, and I thought it might be interesting to explain some of the steps to you.
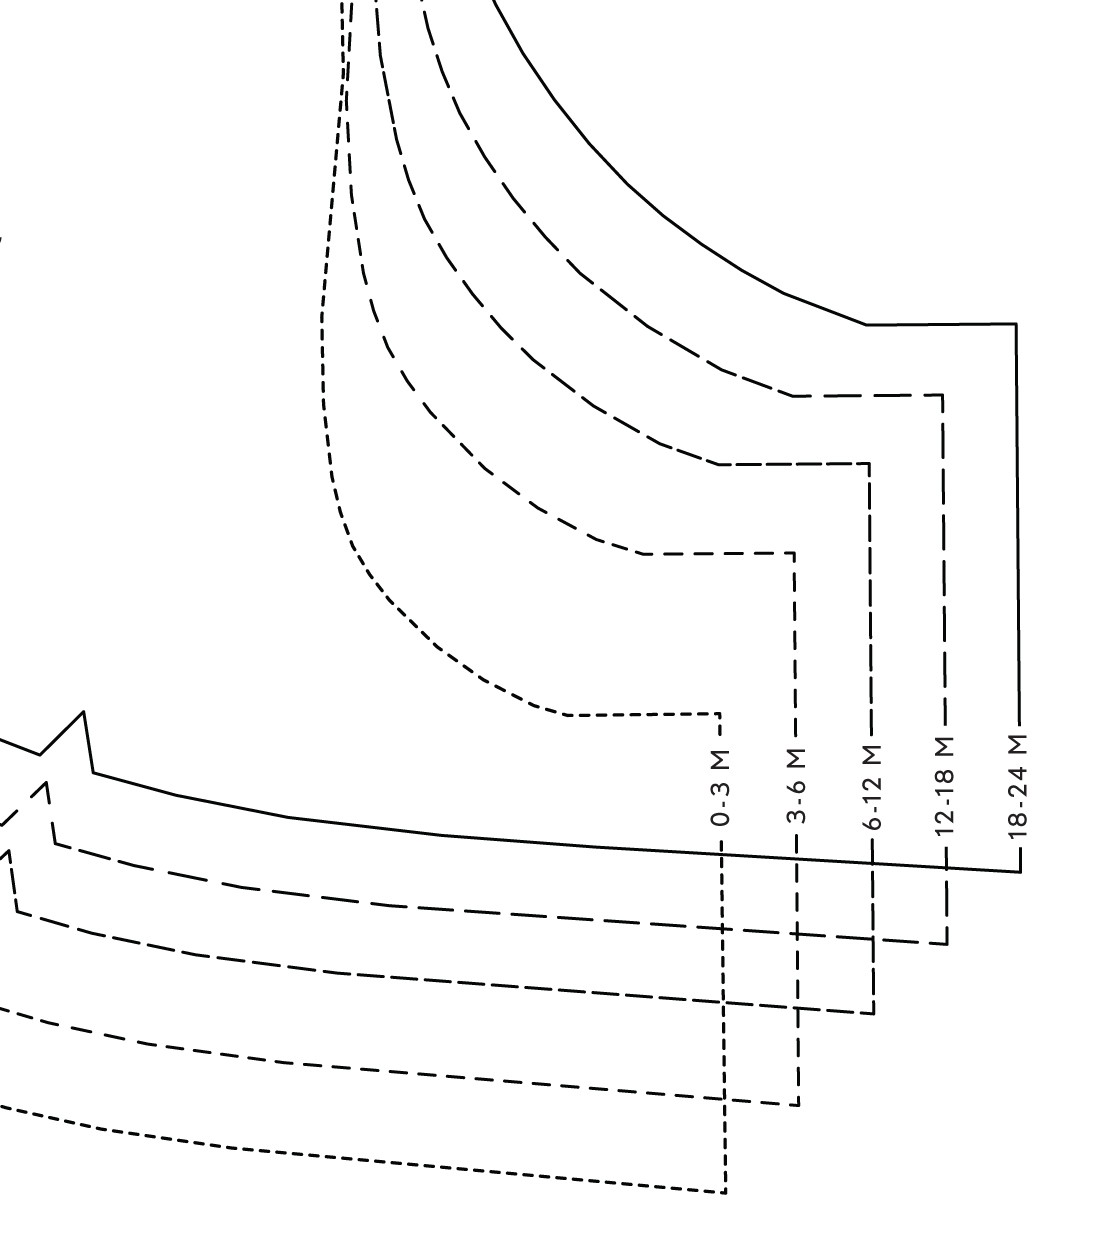
Clothing and sewing patterns always start out from one size, which is called the sample size. For children’s clothing, there are often more than one sample size due to changing proportions, diapers vs. underpants, and various rates of growth from one age to another. One sample size simply wouldn’t cover the multitude of changes from one size to another and may result in a poor fit somewhere down the line.
Surprisingly, it’s more difficult to develop sizes for children’s clothing than for adults, which you probably wouldn’t expect since kids’ clothing is generally looser fitting and the silhouette isn’t as specific as it is for adults. But because of the many variables of children’s growth and development, many patternmakers and technical designers steer clear of children’s clothing. It’s considered a more challenging and demanding job than other patternmaking work.
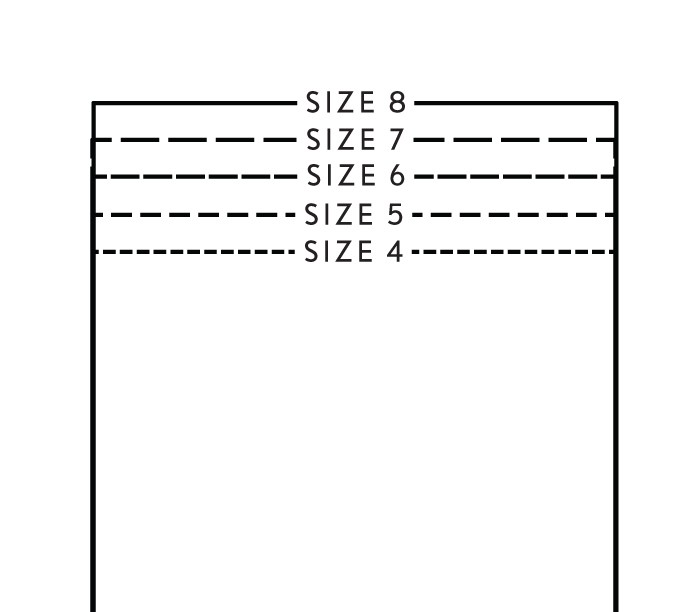
Pattern grading uses a set of mathematical formulas to grow a pattern piece by a specific amount. This is how the various sizes of a pattern or design are developed. Every company has its own set of grade rules, and these are usually guarded closely as a trade secret because they take a lot of time and effort to develop. Once a company has an established set of grade rules, they don’t want to be knocked off by other companies.
Grade rules can also vary from company to company depending on the target customer. For example, a company that makes clothing for young women versus another company who produces a line for a more mature figure will use different measurements for their sizes and, as a result, different grade rules. Some companies prefer a closer-fitting garment, and other companies design clothing drape more loosely on the body. All of these factors come into play in size grading.
Back when I was working for another designer, I often conducted fittings for the activewear line of my employer. Our fit model was a muscular, athletic man who was built like V, with wide shoulders and slim hips. Unfortunately, not all that designer’s customers were built with the same physique, and the bike jersey I fitted on our model looked quite different when worn by my adorable husband; the slim, snug fit looked rather baggy in the shoulders and tight in the waist when worn by a more, shall we say, “average” man?
Developing a larger size from the sample size isn’t simply a matter of enlarging the pattern piece like you would on a photocopy machine. For example, a collar might grow longer to fit around a wider neck on a bigger size, but the height of the collar will probably stay the same or grow only a little bit taller. For this reason, it really does pay, in the end, to sew the correct size of a pattern. Occasionally I hear or read that someone simply eliminated the seam allowances to make a pattern smaller. This always makes me cringe because I know that the pattern pieces probably didn’t fit together properly, and the final garment most likely fits and looks entirely differently than what was intended. Plus, the frustration level on the part of the person sewing the pattern was likely very high when notches didn’t match up, sleeves didn’t fit into armholes, and so on.
(part 2 can be found here)
thanks for posting this. i love the science behind sewing and creating. can’t wait for part 2!
Very interesting. I always wondered about how patterns were graded.
That explains a lot…
Something that will make you laugh is that years and years ago I did costume making (medieval to be exact) and I had to make a tunic for a hefty fellow…well I wasn’t experienced enough to know how to enlarge a standard pattern so I just made everything bigger and ended up with a massive pillowcase with a hole for a head!! He looked ridiculous!! Needless to say I didn’t make many more costumes…and now I stick to quilts..much easier!
This is just SEW great! Although now I want more – lol! Can’t wait for part 2!
Maybe you can answer this question for me – why when sewing w/ a pattern, like simplicity, does it NOT fit if I make the size I measure on the back of the envelope. For example, I measured a size 14 in the waist a 12 in the hips – made a size 10 and it was too big. I made a second skirt in a size 8 and think I could go down to a size 6 (I’m a size 0 at the Gap). Any suggestions on which size to pick?
lizandrobreese@yahoo.com.
thanks for the behind the scenes in your pattern making process. Very interesting!
Liz, this is too late for you but someone else who finds this thread might benefit:
Yes, sizing is a problem, especially with the Big 4 pattern companies. There are different reasons for it and the issue has to be addressed pattern by pattern.
One thing that can help is to look at the written pattern description and see if the garment is described as tight-fitting, fitted, semi-fitted or loose-fitting. If the illustration is of a fitted pencil skirt and the description says “loose-fitting,” then you know it’s oversized and you’ll have to use several sizes down.
If you are using a stiffer fabric than suggested, you will need a smaller size. If the recommendation is voile and you’re using denim, size waaay down!
Sometimes the pattern has a finished bust and/or waist and/or hip circumference for the garment printed on one of the pattern pieces. Measure a garment you already have that fits the way you want this one to, and compare. If you have a skirt with a 34″ waist that you like the fit of, use the size that has 34″ printed as the finished waist circumference.
If the pattern doesn’t have that information printed on it, measure the pattern pieces yourself.
Check out patternreview.com. If the pattern has been reviewed they’ll tell you whether the pattern is true to size. (Hint: it usually isn’t.)
When cutting out the pattern, cut off all the lines. Don’t cut on the outside of the lines.
Measure out the recommended seam allowance and make sure that you’re following it exactly.
Hope this helps someone!